


Set up TALL Stack for Development
Build User Interactive Web App with Tailwind CSS, Alpine JS, Laravel & Livewire


Note: You should have basic knowledge of Laravel, NPM commands before you setup this TALL Stack.
TALL is another popular dev stack in Laravel Community. I personally choose TALL Stack when I need to build small size Web Application without any REST API Feature.
Github Repo: github.com/scriptmint-solution/tall-stack-s..
Here are the steps I prefer to setup TALL Stack.
Setup Laravel 8
You must have Composer v2 installed on your system.
If you wish to install Laravel with Composer, you can run:
composer create-project laravel/laravel vutal
cd vutal
Or
If you have installed Laravel Installer globally as composer dependency, you can run:
laravel new vutal
cd vutal
Install Laravel Livewire
To install Laravel Livewire, run below command:
composer require livewire/livewire
You will also need to link Livewire's asset but we will come back to this step later.
Add Tailwind CSS 3
To install Tailwind CSS 3, you can run:
npm install -D tailwindcss
npx tailwindcss init
This will create tailwind.config.js file which you can use to configure your tailwind setup. The default content of tailwind.config.js is as below:
module.exports = {
  content: [
    './resources/**/*.blade.php',
  ],
  theme: {
    extend: {},
  },
  plugins: [],
}
Note: We are searching for all blade.php files and removing unused classes to reduce the size of your css file.
Next, create an app.scss file under resources/sass folder and put following content:
@tailwind base;
@tailwind components;
@tailwind utilities;
You also need to install additional dependencies by running below command:
npm install resolve-url-loader sass sass-loader --save-dev
Add AlpineJS
There are two ways you can add AlpineJS in your project. First one is using CDN (I rarely use it). I use to go with second one as following:
npm install alpinejs
Next, edit your resources/js/app.js file and import AlpineJS as below:
import Alpine from 'alpinejs'

window.Alpine = Alpine
Alpine.start()
We will see its magic in a few moments.
Now, edit your webpack.mix.js file that will compile your assets.
const mix = require('laravel-mix');
const tailwindcss = require('tailwindcss');

mix.js('resources/js/app.js', 'public/js')
    .sass('resources/sass/app.scss', 'public/css')
    .options({
        postCss: [ tailwindcss('./tailwind.config.js') ],
    });
Also, build your assets using npm command:
npm run dev
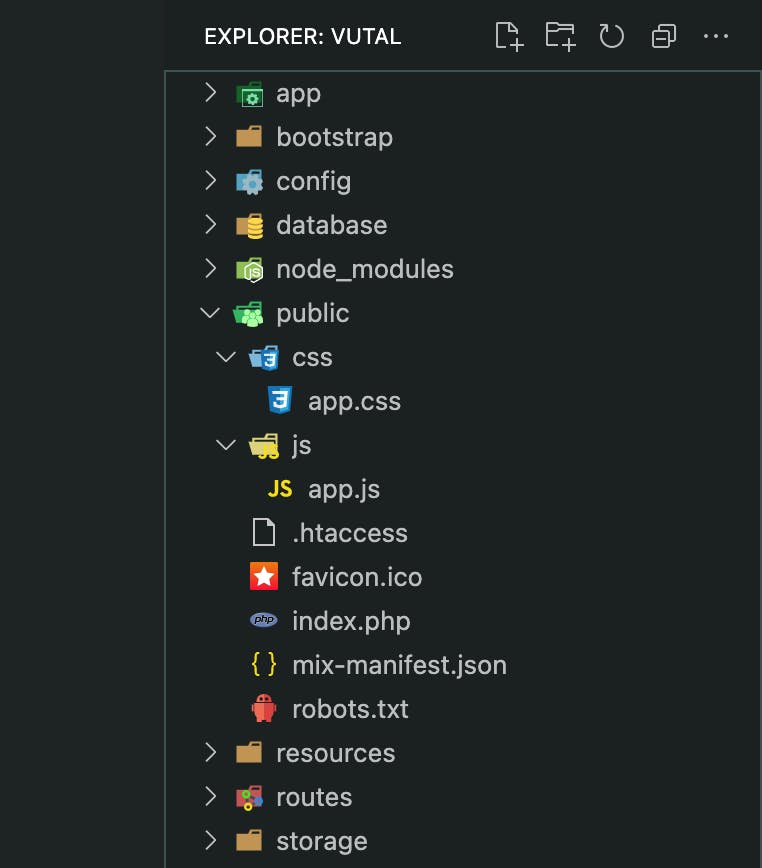
The assets are generated under public folder as shown in the image below:
You can link these assets to your welcome.blade.php file as below.
<!DOCTYPE html>
<html lang="en">
    <head>
        <meta charset="utf-8">
        <meta http-equiv="X-UA-Compatible" content="IE=edge">
        <meta name="viewport" content="width=device-width, initial-scale=1">
        <title>Hello World</title>
        <link href="/css/app.css" rel="stylesheet">
        @livewireStyles
    </head>
    <body>

        <div class="h-screen w-full flex justify-center items-center bg-gray-800">
            <!-- Livewire component will be placed here -->
        </div>
        <script src="/js/app.js"></script>
        @livewireScripts
    </body>
</html>
Note that we also added Livewire assets in our blade file and also put some Tailwind styling.
Your TALL Stack setup is now completed. Its time to add your first Livewire component, run below command to create a Livewire component:
php artisan make:livewire counter
This will generate Counter.php file under app/Http/Livewire directory & a counter.blade.php file under resources/views/livewire directory.
Edit counter.blade.php file and put some Livewire magic over there.
<div class="space-x-4">
    <button class="bg-gray-300 px-4 py-2 rounded text-gray-700" wire:click="increment">Increment</button>
    <button class="bg-gray-300 px-4 py-2 rounded text-gray-700" wire:click="decrement">Decrement</button>

    <div class="block py-4 text-gray-300 text-center">{{$count}}</div>
</div>
We are generating two buttons to to change the counter value. The increment & decrement functions are defined in Counter.php file as below:
<?php

namespace App\Http\Livewire;

use Livewire\Component;

class Counter extends Component
{
    public $count = 0;

    public function increment()
    {
        $this->count++;
    }

    public function decrement()
    {
        $this->count--;
    }

    public function render()
    {
        return view('livewire.counter');
    }
}
Your Livewire component is ready, add it in your welcome.blade.php file as below:
<div class="h-screen w-full flex justify-center items-center bg-gray-800">
    @livewire('counter')
</div>
Now, compile the assets once again & navigate to your application in your browser.
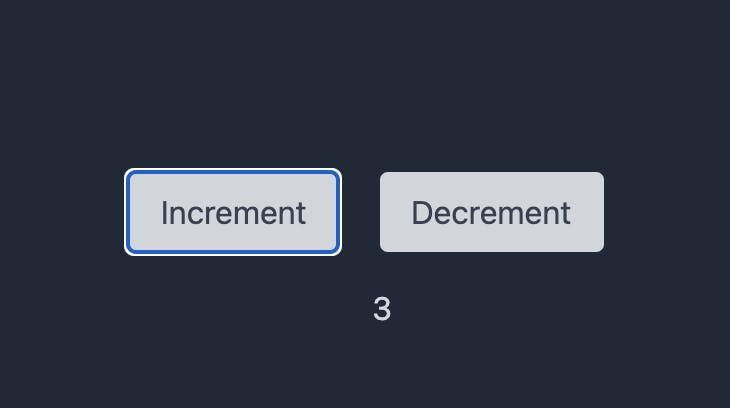
See the Livewire magic yourself. You can increment or decrement counter's value without any page refresh.
Lets see the magic of AlpineJS. Add another button toggle in counter.blade.php file to show & hide the counter.
<div class="space-y-4" x-data="{show: true}">
    <button class="bg-blue-300 px-4 py-2 rounded text-blue-700" @click="show = ! show">Toggle</button>

    <div class="space-x-4" x-show="show">
        <button class="bg-gray-300 px-4 py-2 rounded text-gray-700" wire:click="increment">Increment</button>
        <button class="bg-gray-300 px-4 py-2 rounded text-gray-700" wire:click="decrement">Decrement</button>

        <div class="block py-4 text-gray-300 text-center">{{$count}}</div>
    </div>
</div>
Refresh the page & see the magic of AlpineJS. You can toggle the visibility of counter buttons with minimal 3 lines of AlpineJS code.

I hope you like this post. If you have any query, please comment.